![]()
Isometric drawings

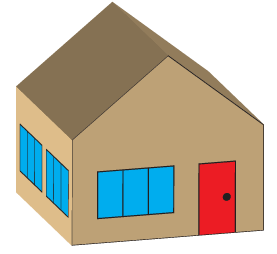
An isometric drawing combines the three views in one. The object is drawn so that the front, one side and the top views of the solid are all visible to the person viewing the drawing. This is called the isometric drawing of the solid. The isometric drawing of the house on the previous page is shown above.
Note that from this view, the geometric properties of the faces of the solid are not maintained. The right angles are not right angles when measured. But parallel lines remain parallel.
Drawing on isometric paper

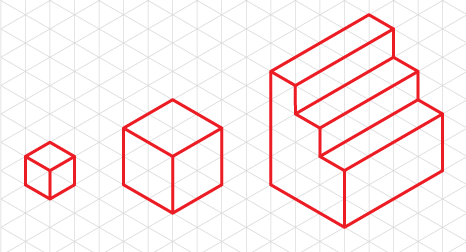
Isometric paper is used for drawing solids from an isometric viewpoint. The angles formed by lines on the paper represent right angles from the isometric viewpoint. This paper is best suited for drawing shapes with horizontal bases and side faces that are upright and at right angles to each other. The simplest solid is the cube, a prism.
This picture shows two cubes and a short set of steps all drawn from the isometric viewpoint.
Example
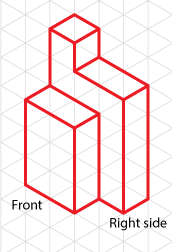
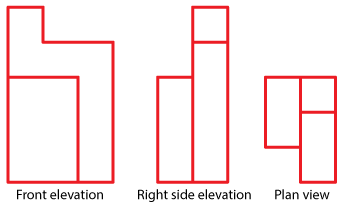
Draw the front, side and plan views of the solid pictured.
Solution
Increasingly, engineers, architects and other designers use specialised computer software called CAD systems to produce detailed drawings. But the principles are the same, and all designs are presented isometrically, accompanied by front, side and plan views.


